
Understanding Your HP Printer Cartridges
Before you even think about refilling or replacing the ink in your HP printer, it’s a good idea to get a handle on what kind of cartridges your specific model uses and when they actually need attention. It might seem obvious, but knowing this stuff can save you a lot of hassle. Not all HP printers use the same ink cartridges, and understanding the differences is key to a smooth refill process.
Identifying Your Cartridge Type
HP uses a few different systems for their ink. Most commonly, you’ll find either tri-color cartridges (which hold cyan, magenta, and yellow ink in one unit) or individual black and color cartridges. Some higher-end or photo printers might use a combination of both, or even more specialized cartridges for different ink colors like light cyan or light magenta. The easiest way to figure out what you need is to check your printer’s manual or look directly at the cartridges currently installed in your printer. They usually have a model number printed on them, like HP 63, HP 67, or HP 952. You can also often find this information on HP’s support website by entering your printer model number.
When to Replace Your Ink Cartridge
So, how do you know when it’s time to swap out an old cartridge for a new one? The most straightforward sign is when your printer tells you the ink is low or empty. Most HP printers will display a message on their screen or on your computer when a cartridge is running out. Beyond that, you’ll start to notice a drop in print quality. This could mean faded colors, light or missing black text, or horizontal lines appearing on your documents. If you’re printing a lot, you might go through ink faster than you expect. It’s also worth noting that even if a cartridge isn’t completely empty, if it’s been sitting in the printer for a very long time without use, the ink can dry out, leading to poor print quality. It’s generally best to replace a cartridge when the printer indicates it’s low or when you see a noticeable decline in your prints.
Don’t wait until the cartridge is completely bone dry to replace it. Printers often have a small amount of ink left even after they say it’s empty, but trying to print with no ink can sometimes damage the print heads. It’s better to be prepared.
Preparing for the Ink Refill Process
Before you get your hands dirty with ink, it’s a good idea to get a few things sorted out. This prep work makes the whole process smoother and helps avoid any messy surprises. Think of it like getting your tools ready before starting a DIY project – it just makes sense.
Gathering Necessary Supplies
So, what do you actually need? It’s not a ton of stuff, but having it all handy will save you a trip to the store mid-task. You’ll want your new ink cartridge, obviously. Make sure it’s the right model for your HP printer; checking the printer manual or the old cartridge is key here. You might also want some paper towels or an old cloth. Ink can be a bit messy, and these will be your best friends for wiping up any drips or smudges. Some people like to wear gloves, too, to keep their hands clean. It’s a small thing, but it can make a difference.
Ensuring Printer Readiness
Your printer needs to be in the right state before you start swapping cartridges. First off, turn the printer on. Most HP printers will automatically move the ink cartridges to a position where they are easy to access when the printer is on and the cover is open. If you try to do this with the printer off, you might not be able to get to the cartridges properly, or worse, you could damage the print head mechanism. Also, make sure you have enough space around the printer to work comfortably. You don’t want to be cramped or have to move things around while you’re holding a new ink cartridge. It’s also a good time to check if there are any error messages on the printer’s display. If there’s a paper jam or another issue, it’s best to clear that up first.
It’s really about setting yourself up for success. A little bit of preparation goes a long way in making sure the ink replacement is a straightforward task, not a frustrating ordeal.
Step-by-Step Guide to Refilling Ink
Alright, let’s get down to business with actually putting that new ink into your HP printer. It sounds a bit intimidating, but honestly, it’s usually pretty straightforward. Just follow these steps, and you’ll be printing again before you know it.
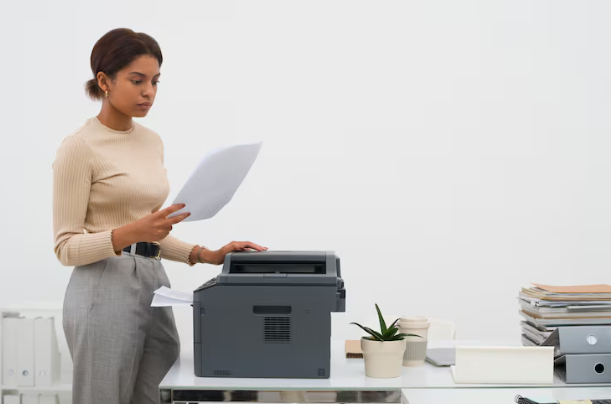
Locating the Ink Cartridge Compartment
First things first, you need to find where the ink cartridges live. Most HP printers have a little door or panel on the front or top that you can open. Sometimes, the printer will even move the carriage (that’s the part that holds the cartridges) to the center when you open it, making it easier to reach. If yours doesn’t do that automatically, you might need to turn the printer on and then open the access door. Don’t try to force anything open; if it doesn’t budge easily, check your printer’s manual.
Removing the Old Cartridge
Once you’ve got the compartment open and the carriage is accessible, you’ll see the ink cartridges. They usually have a little tab or lever you need to press or lift. Gently push down on the tab and then pull the cartridge straight out of its slot. It shouldn’t take much force. Be careful not to touch the electrical contacts or the ink nozzle itself – those parts are sensitive and need to stay clean.
Inserting the New Cartridge
Now for the new ink. Take the new cartridge out of its packaging and remove any protective tape or plastic covers. Again, avoid touching the contacts or the nozzle. Line up the new cartridge with the empty slot, making sure it’s oriented correctly (there’s usually a specific way it fits). Push it firmly into the slot until it clicks into place. You should feel it seat properly. Once it’s in, close the access door or panel.
After you’ve installed the new cartridge, your printer will likely go through a brief initialization or alignment process. This is normal and helps the printer recognize the new ink and get ready for printing.
Post-Refill Printer Maintenance
So, you’ve just swapped out your ink cartridges. Great job! But don’t just close the printer lid and expect magic. A little bit of post-refill care can save you a lot of headaches later on, and it’s not really complicated. Think of it like giving your printer a quick check-up after a tune-up. It helps make sure everything is working right from the get-go.
Running a Print Head Cleaning Cycle
Sometimes, when you replace cartridges, a little air can get into the system, or the new ink just needs a moment to get flowing properly. Running a cleaning cycle helps push out any air bubbles and gets the ink flowing smoothly to the print heads. Most HP printers have this feature built right in. You can usually find it through the printer’s control panel on the printer itself, or sometimes through the printer software on your computer. It’s a pretty standard part of basic printer repair.
Performing a Test Print
After the cleaning cycle, the best way to see if everything is good to go is to print something. A test print is perfect for this. It doesn’t have to be a big document; even a simple page with some text and maybe a small graphic will do. Look closely at the test print. Are the colors looking right? Is the text sharp and clear? Are there any weird lines or smudges? If it looks good, then you’re all set. If not, you might need to run the cleaning cycle again, or maybe even check if the cartridge is seated correctly.
It’s always a good idea to keep a spare ink cartridge on hand. You never know when you’ll run out unexpectedly, and having one ready means less downtime for your printer.
Troubleshooting Common Ink Issues
Sometimes, even after you’ve swapped out the ink, your HP printer might act up. It’s frustrating when you need to print something important and all you get are blank pages or faded lines. Let’s look at why this happens and how to fix it.
Addressing Streaky or Faded Prints
Streaky or faded prints usually mean the print heads aren’t getting the ink properly. This could be due to a few things. Maybe there’s an air bubble in the cartridge, or the print head itself is clogged. The most common fix is to run a print head cleaning cycle through your printer’s software. You can usually find this option in the printer settings or maintenance menu. If that doesn’t work, you might need to manually clean the print heads, but be careful with that – check your printer’s manual first.
Here are some common causes and solutions:
- Clogged Print Heads: Ink dries up and blocks the tiny nozzles. Cleaning cycles usually fix this.
- Low Ink Levels: Even if the printer says there’s some ink left, it might not be enough for a good print.
- Incorrect Cartridge Installation: The cartridge might not be seated properly, preventing ink flow.
- Air Bubbles: Sometimes, air gets trapped in the cartridge. Reinstalling the cartridge can help.
Resolving Cartridge Not Recognized Errors
This is a really annoying one: you put in a new cartridge, and the printer just says “Cartridge not recognized” or something similar. It’s a common problem, and there are a few reasons why this might happen.
- Protective Tape Left On: Did you remember to pull off all the plastic tape and tabs? Sometimes there’s a small piece you might miss.
- Faulty Cartridge: It’s rare, but sometimes a new cartridge is just defective.
- Dirty Contacts: The little metal contacts on the cartridge and inside the printer need to be clean to communicate.
To fix this, try these steps:
- Remove and Reinstall: Take the cartridge out, check for any protective tape, and then put it back in firmly until it clicks.
- Clean the Contacts: Gently wipe the gold or copper-colored contacts on the cartridge with a lint-free cloth or a pencil eraser. Also, carefully wipe the contacts inside the printer carriage where the cartridge sits.
- Try a Different Cartridge: If you have another compatible cartridge, try installing that one to see if the issue is with the cartridge itself.
- Restart the Printer: Turn off your printer, unplug it for a minute, and then plug it back in and turn it on. This can sometimes reset the system and recognize the cartridge.
If you’re still having trouble after trying these steps, it might be time to contact HP support or consider if the cartridge you bought is truly compatible with your specific printer model. Using the wrong type of cartridge is a frequent cause of recognition issues.
Finding Reliable Printer Cartridge Suppliers
Choosing Quality Ink for Your HP Printer
When you need to buy new ink, it’s easy to just grab whatever’s on sale. But not all ink is made the same, and using the wrong kind can cause problems down the road. HP’s own brand cartridges are generally the safest bet for compatibility and print quality, but they can be pricey. If you’re looking at third-party options, do a little homework. Check reviews specifically mentioning your HP printer model. Some off-brand inks might work fine, but others can lead to faded colors, clogged print heads, or even damage your printer. It’s a bit of a gamble, so weigh the cost savings against the potential risks.
Where to Purchase Replacement Cartridges
There are a few main places to get your HP printer ink. Your local office supply stores, like Staples or Office Depot, usually have a good selection. Big box retailers such as Walmart or Target also carry printer cartridge suppliers. Online retailers like Amazon or Best Buy are popular choices too, often with a wider variety and competitive pricing. Don’t forget HP’s own website; they’ll always have the official cartridges for your specific model.
Tips for Buying from Printer Cartridge Suppliers
- Check the return policy: Make sure you can return the cartridge if it doesn’t work with your printer.
- Look for warranties: Some suppliers offer a warranty on their cartridges, which is a good sign of quality.
- Compare prices: Don’t just buy the first one you see. Shop around a bit to get the best deal.
- Read customer reviews: See what other people are saying about the supplier and their products.
Buying ink can feel like a chore, but taking a few minutes to find a good supplier can save you headaches later. It’s better to spend a little more time upfront than to deal with a printer that won’t print or produces terrible quality pages.
Wrapping Up Your Ink Refill
So, that’s pretty much it. Refilling or replacing your HP printer ink might seem like a big deal at first, but as we’ve seen, it’s usually a straightforward process. Just take your time, follow the steps, and you should be printing again in no time. If you run into any trouble, don’t get too stressed. Sometimes printers can be a bit finicky, but usually, a quick check of the manual or a search online can sort things out. Happy printing!
Frequently Asked Questions
What kind of ink cartridges does my HP printer use?
Most HP printers use either black ink cartridges for text or tri-color cartridges for photos and graphics. Some models might use separate color cartridges (cyan, magenta, yellow). Check your printer’s manual or the HP website if you’re unsure which type you have.
How do I know when to change the ink?
You’ll usually see an ‘low ink’ warning on your computer screen or a blinking light on the printer. If your prints start looking faded, have missing colors, or are just plain white, it’s probably time for a new cartridge.
What supplies do I need to change the ink?
You’ll need your new HP ink cartridge, maybe a damp cloth or paper towel, and possibly gloves to keep your hands clean. Make sure your printer is turned on and ready to go.
How do I physically swap out the old ink cartridge for a new one?
Open the printer cover. The cartridge holder should move to the center. You might need to press a button or gently pull a lever to release the old cartridge. Then, just slide the new one in until it clicks.
What should I do after putting in the new ink?
After changing the ink, your printer usually prompts you to run a cleaning cycle. This helps get the ink flowing correctly. Then, print a test page to make sure everything looks good. If not, you might need to run the cleaning cycle again.
What if my new ink isn’t working right?
If prints are streaky, try running the print head cleaning utility through your printer’s software. If the printer says the cartridge isn’t recognized, make sure it’s seated correctly and that you’ve removed any protective tape. Sometimes, a faulty cartridge needs to be replaced.